The Web EDI Application allows you to create an unlimited amount of Ship From / Load-At Locations for your company. Each entry would specify a unique location (warehouse) from which your product is packaged and distributed. The corresponding Load-At ID that is created for your Ship From Location is used when creating a Request for Routing Instructions.
- On your account home page click on the link labeled Ship From / Load-At Addresses under the Account Management Tab. Alternatively, you may point your browser on the Acct. Maint. link on the header / footer toolbar and select the Ship From / Load-At Addresses link from the menu.
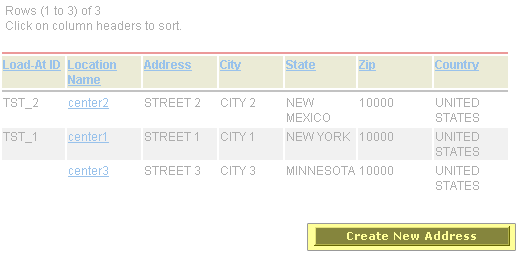
- You will be brought to a screen which displays all of the Ship From / Load-At Addresses you have on file. To create a new Load-At Address click on Create New Address.
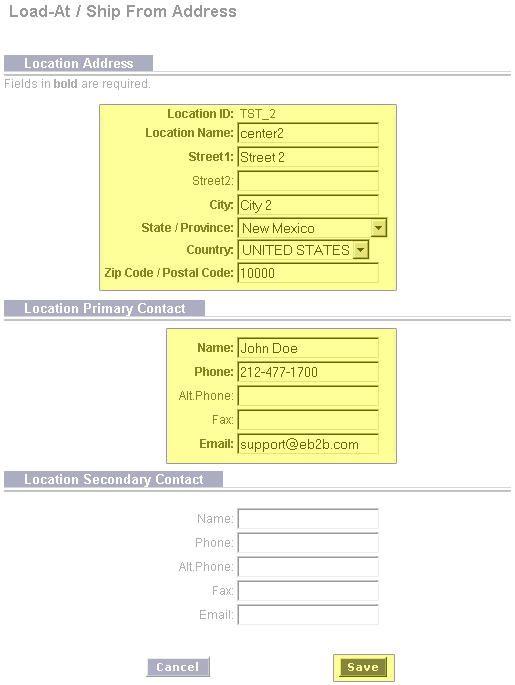
- This will bring you to a screen labeled Load-At / Ship From Address. You will be prompted to enter the location address as well as the primary and secondary contact at the location. Fields labeled in Bold are required. Once complete click on Save at the bottom screen.
- You will then be brought to the screen labeled Loading Hours. On this page you are required to enter the specific Loading Hours on each day that the Load-At Address is in operation and will be Loading. Populate the From and To fields with the local time in a HHMM format. If a Load-At Location is not in operation on a specific day the From and To fields should be left blank.
- After populating all of the Weekly Loading Hours any specific date exceptions when a Load-At Address will not be in operation may be entered under the Date Exceptions tab. If there are no exceptions, all of the fields in the section may be left blank.
- After populating all of the required information click on the Save button at the bottom of your screen. By clicking the Save button an automatic notification will be sent to the retailer informing them of your new Load-At Location. Best Buy will review all of the information you have entered and contact you with a specific Load-At ID for the new location you have just created.
Note: You will not be able to transmit a Request for Routing Instructions using your new Load-At Location until you receive confirmation from the retailer with your new Load-At ID. Once Best Buy has provided you with your new Load-At ID, the corresponding ID will be available in the Load-At ID Look Up when creating a Routing Request.


|

